Before you press the button, you've already made a choice: which view do you need? Some images give fine detail on one tooth; others sweep the whole jaw. Pick wrong and you re-shoot — and re-shoot means more dose.
Watch first — intraoral vs. extraoral, in about two and a half minutes.
1The first question
Every image answers one question: how much do you need to see?
Dental radiographs split into two families. Intraoral images put the receptor inside the mouth, right behind the teeth — so they're sharp and detailed, but each one only covers a small area. Extraoral images keep the receptor outside the mouth and shoot through the head — so they cover a lot of ground at once, at the cost of fine detail.
So the whole skill is a trade-off you make on purpose: detail versus coverage. Nail that and the six names below fall into place.
2The instrument
Name the goal. See the right image.
Pick what the dentist is trying to find, and look at a real radiograph of that exact image type — then read why it's the right call.
Which image? — matcher
Fig. 8.1 · interactive
Pick the clinical goal
What that image captures
Bitewing
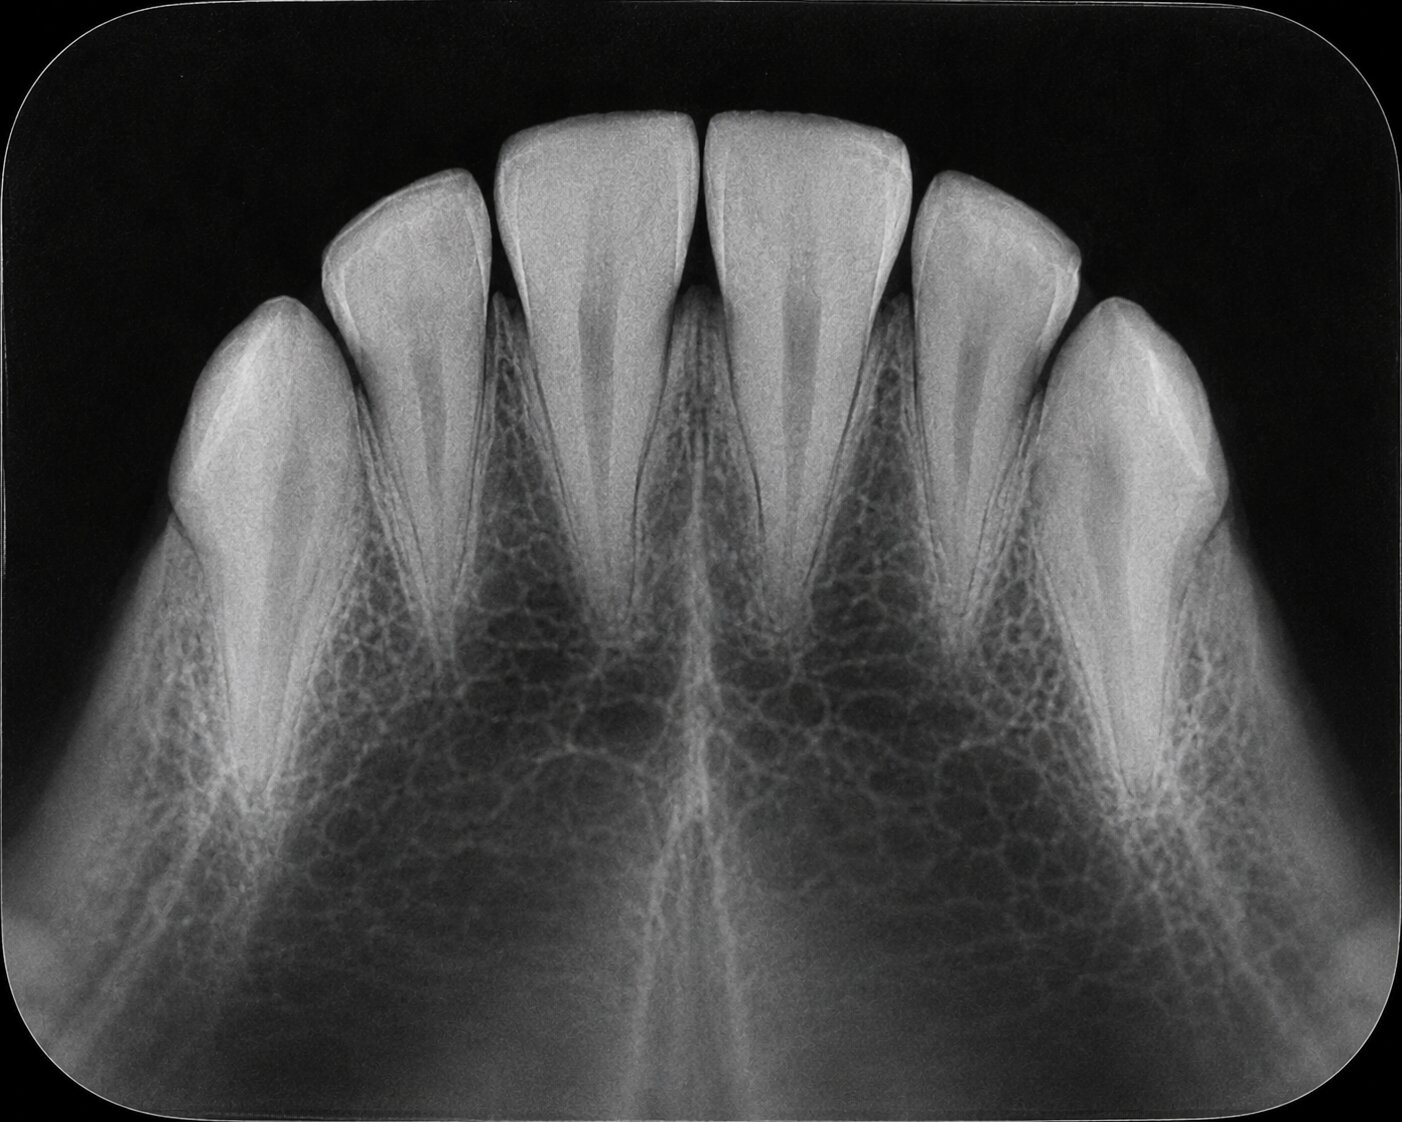
Real photo pending — a maxillary occlusal is anterior-focused, taken at a steep beam angle. We'll swap in an accurate one.
—
3The rule, in one line
Inside the mouth → detail. Outside the mouth → coverage.
Ask "detail or coverage?" first, and intraoral-vs-extraoral answers itself: intraoral (periapical, bitewing, occlusal) for a close look; extraoral (panoramic, cephalometric, CBCT) for the wide view.
4The six, side by side
Your one-screen reference.
Image
Family
What it shows & when to reach for it
Periapical
Intraoral
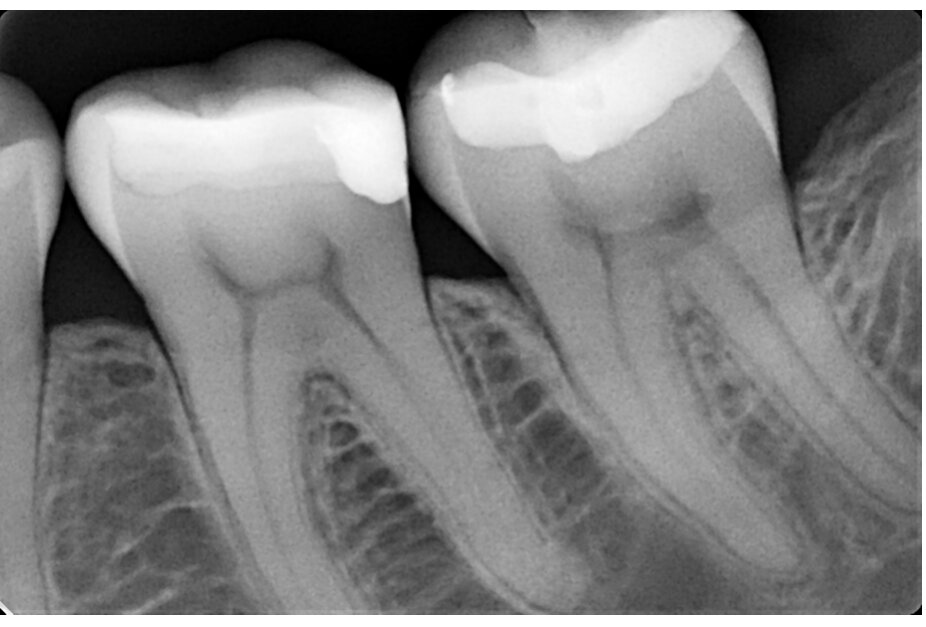
The whole tooth — crown to root apex — plus the surrounding bone. Reach for it for abscesses, root fractures, and periapical pathology.
Bitewing
Intraoral
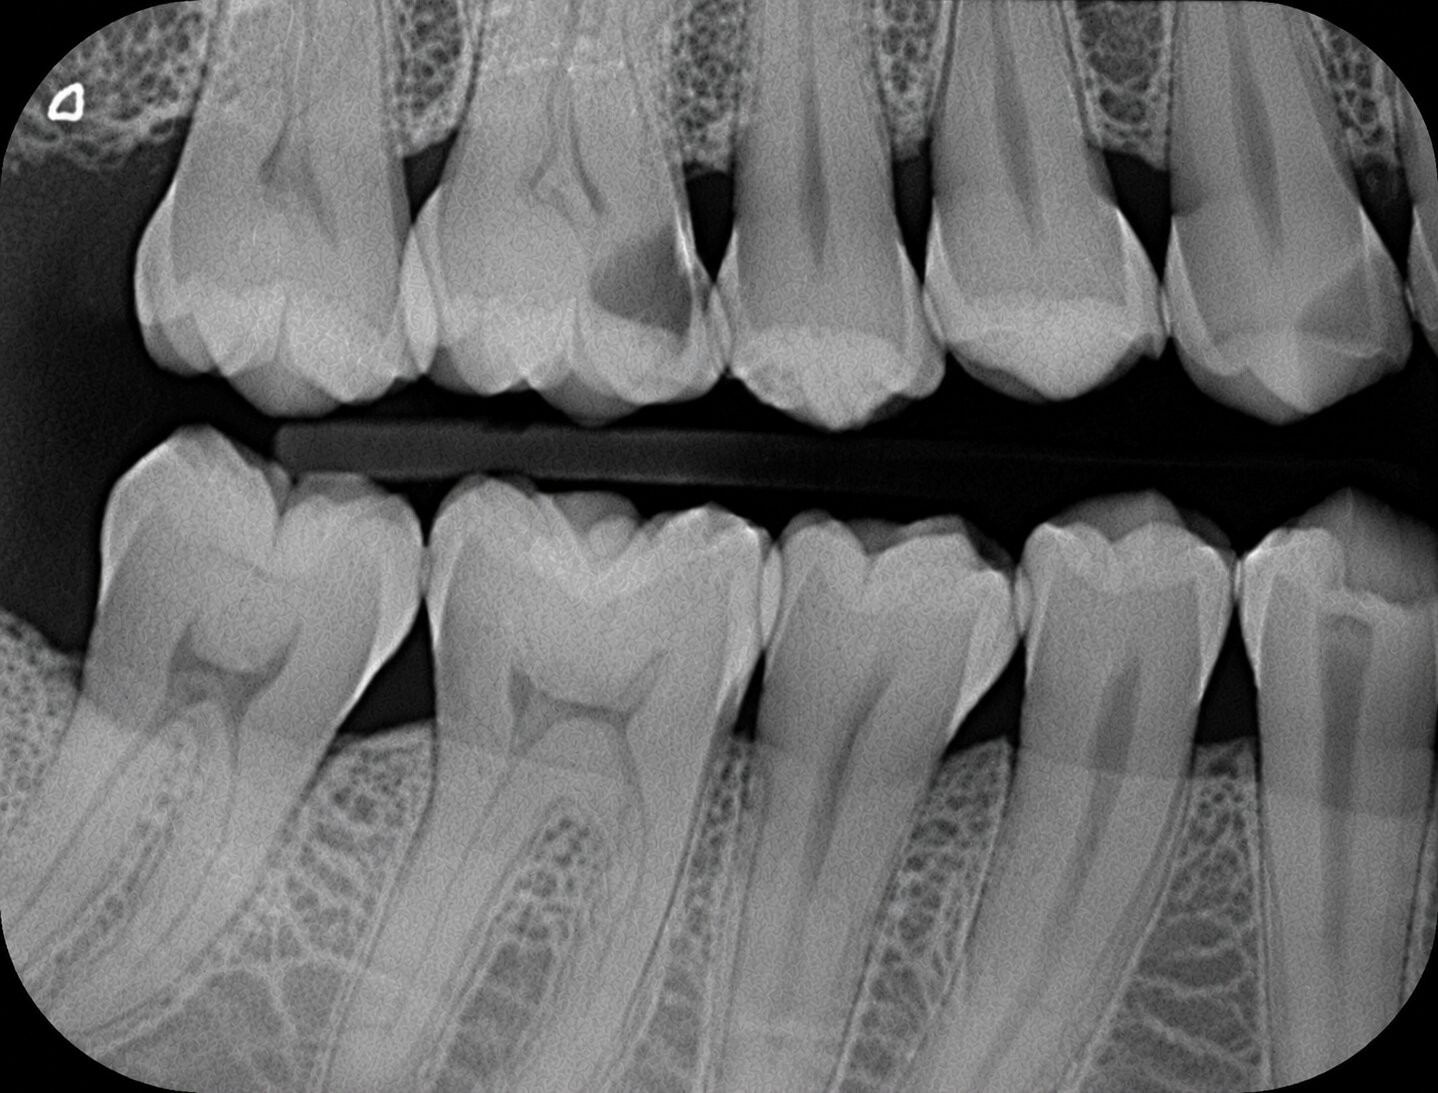
The crowns of upper and lower teeth in one shot, with the crestal bone. The go-to for interproximal decay and bone levels. Shows no root tips.
Occlusal
Intraoral
A larger receptor on the biting surface giving a broad arch view. Locates impacted or extra teeth, salivary stones, and jaw fractures.
Panoramic
Extraoral
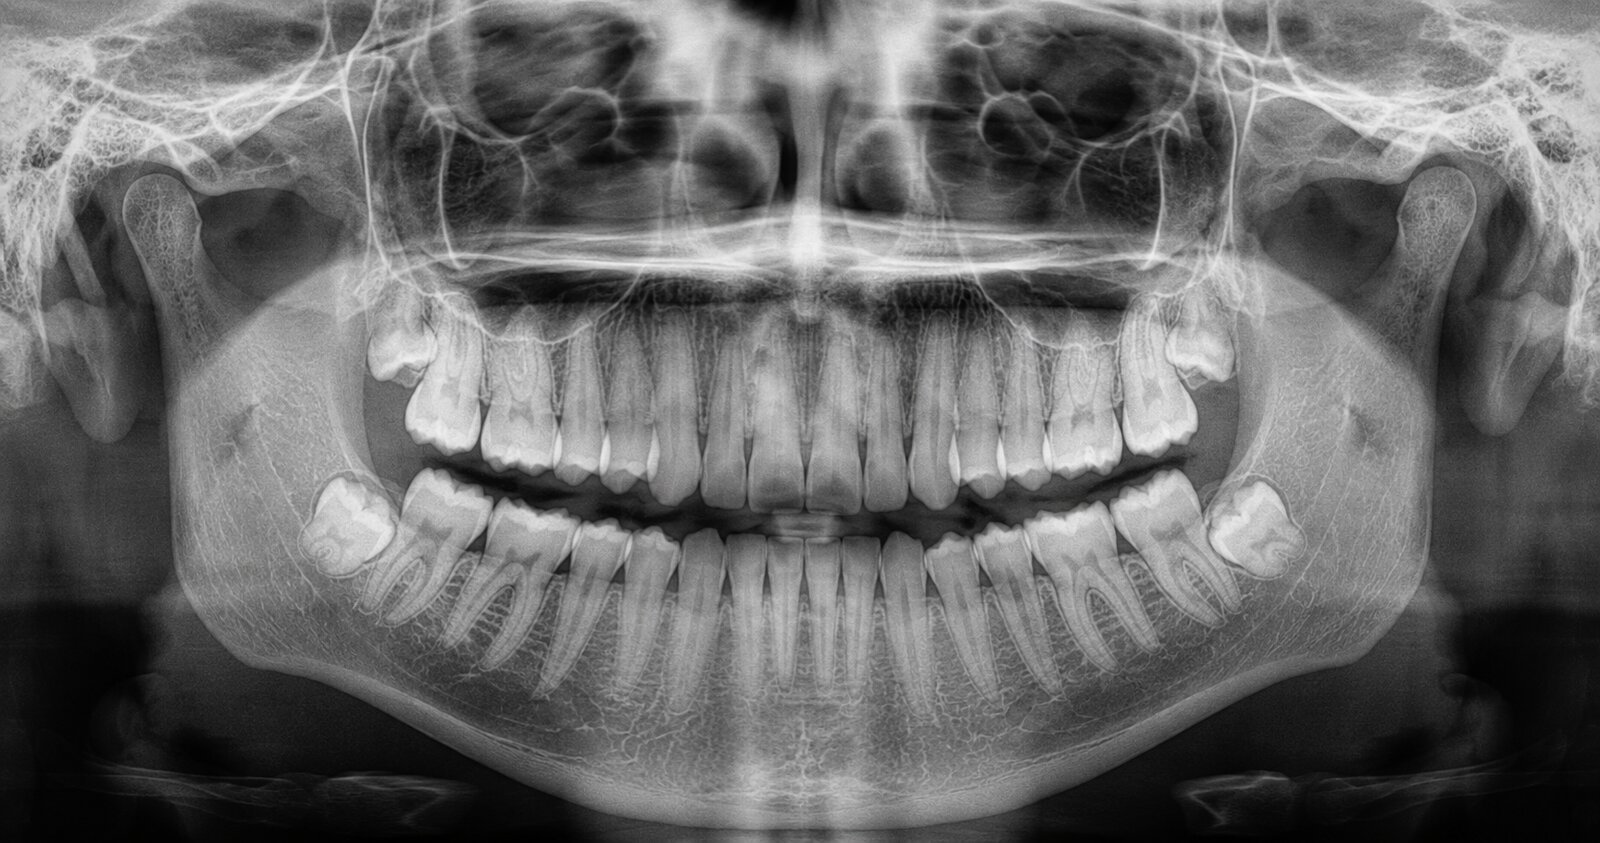
One broad image of both jaws, sinuses, and TMJs. Ideal for impacted third molars and whole-mouth surveys; too little detail for decay.
Cephalometric
Extraoral
A lateral view of the skull and facial profile. Used in orthodontics to assess growth and jaw relationships.
CBCT
Extraoral
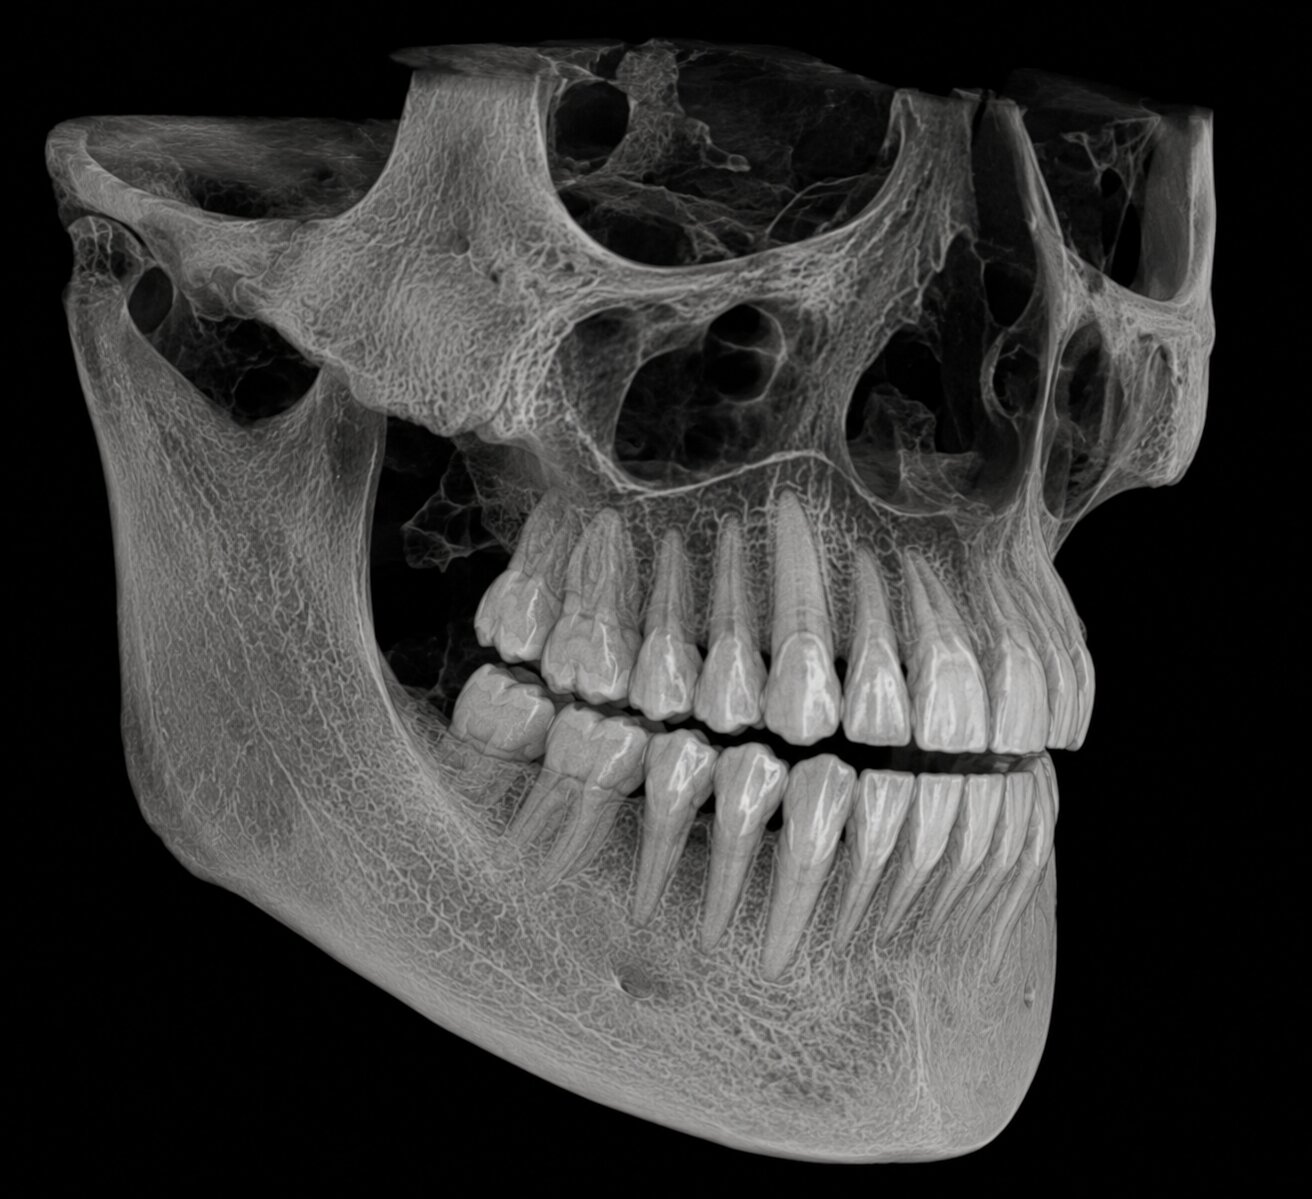
A 3-D volume of the jaws. Used for implant planning, impactions, and complex TMJ or anatomical assessment.
★ Bonus clip
Cephalometric, up close.
A quick extra look at the lateral skull view — how it's taken and what it's used for.
5See them for real
What each one actually looks like.
Reading the words is one thing — recognizing the picture is what the exam tests. Learn the shape of each view.
Periapical
Intraoral
One or two whole teeth, crown to apex, with the bone around the root tips.
Bitewing
Intraoral
Upper and lower crowns meeting in one shot — built to catch decay between teeth.
Occlusal
Intraoral
Anterior-focused — the front teeth and palate from a steep beam angle, not a full symmetric arch.
Panoramic
Extraoral
Both jaws, sinuses, and joints in one wide sweep — great for impacted molars.
CBCT
Extraoral · 3-D
A rotatable 3-D reconstruction of the jaws — depth a flat film can't show.
Lateral jaw
Extraoral
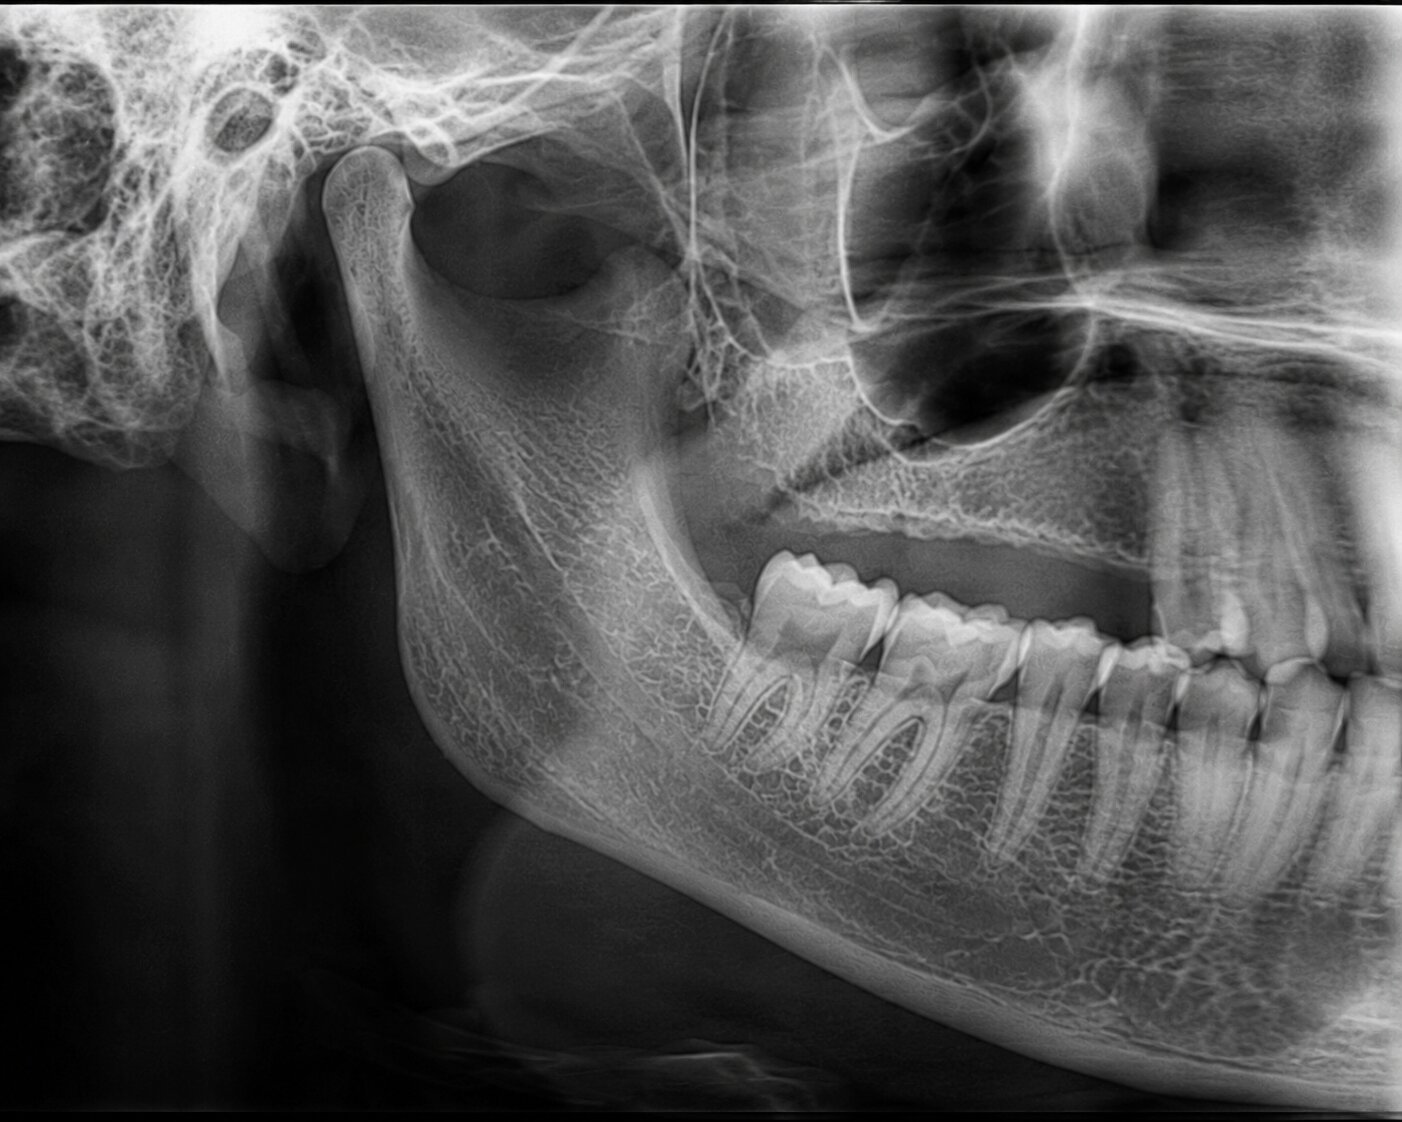
The side of the mandible — ramus and body — for large lesions and fractures.
6Panoramic positioning
Get the head right, or the pano lies.
The panoramic is the one image where patient position makes or breaks it. Level the Frankfort plane — external auditory meatus to the floor of the orbit — parallel to the floor, then watch for these five. They're exam favorites.
Positioning error
What shows on the pano
The fix
Chin tipped upFrankfort plane angled up
A flat, downturned "reverse smile" (frown); the hard palate shadows over the maxillary roots.
Lower the chin so the plane is level.
Chin tipped downFrankfort plane angled down
An exaggerated smile (deep V); the lower front teeth blur and the condyles can be cut off.
Raise the chin to level the plane.
Tongue not on the palate
A dark radiolucent shadow (trapped air) over the apices of the maxillary teeth.
Press the tongue to the roof of the mouth.
Slumped, not straight
The spine projects a radiopaque column over the anterior teeth.
Sit or stand tall — reach up out of the shoulders.
Too far forward / back
Narrow & blurred anteriors (too far forward) or wide & magnified (too far back).
Bite in the groove so teeth sit in the focal trough.
7Spot it on the exam
DANB describes the clinical goal — you pick the image.
"decay between the teeth"→Bitewing
"root tip / periapical abscess / whole tooth length"→Periapical