Every bad x-ray has a fingerprint — a look that tells you exactly what went wrong. Learn the seven fingerprints and you can name the error in a second.
A bitewing error is anything that makes the image hard to read — and each common error leaves a distinct visual clue. Learn the clue, name the error, know the fix.
The exam tests this as recognition: it gives you the symptom (a clear band, a blurry image, a black film) and asks for the cause. You don't memorize seven definitions — you learn to recognize seven looks.
A doctor looking at a rash doesn't memorize a list — they recognize a pattern. "Bullseye shape? Tick bite." One look, one diagnosis. Reading a bad x-ray works the same way: each error looks like only one thing.
A clear curved corner can only be a cone-cut. A totally black film can only be light exposure. Learn the look, and the name comes automatically — even on an x-ray you've never seen before. Seven fingerprints, seven fixes. Let's see them.
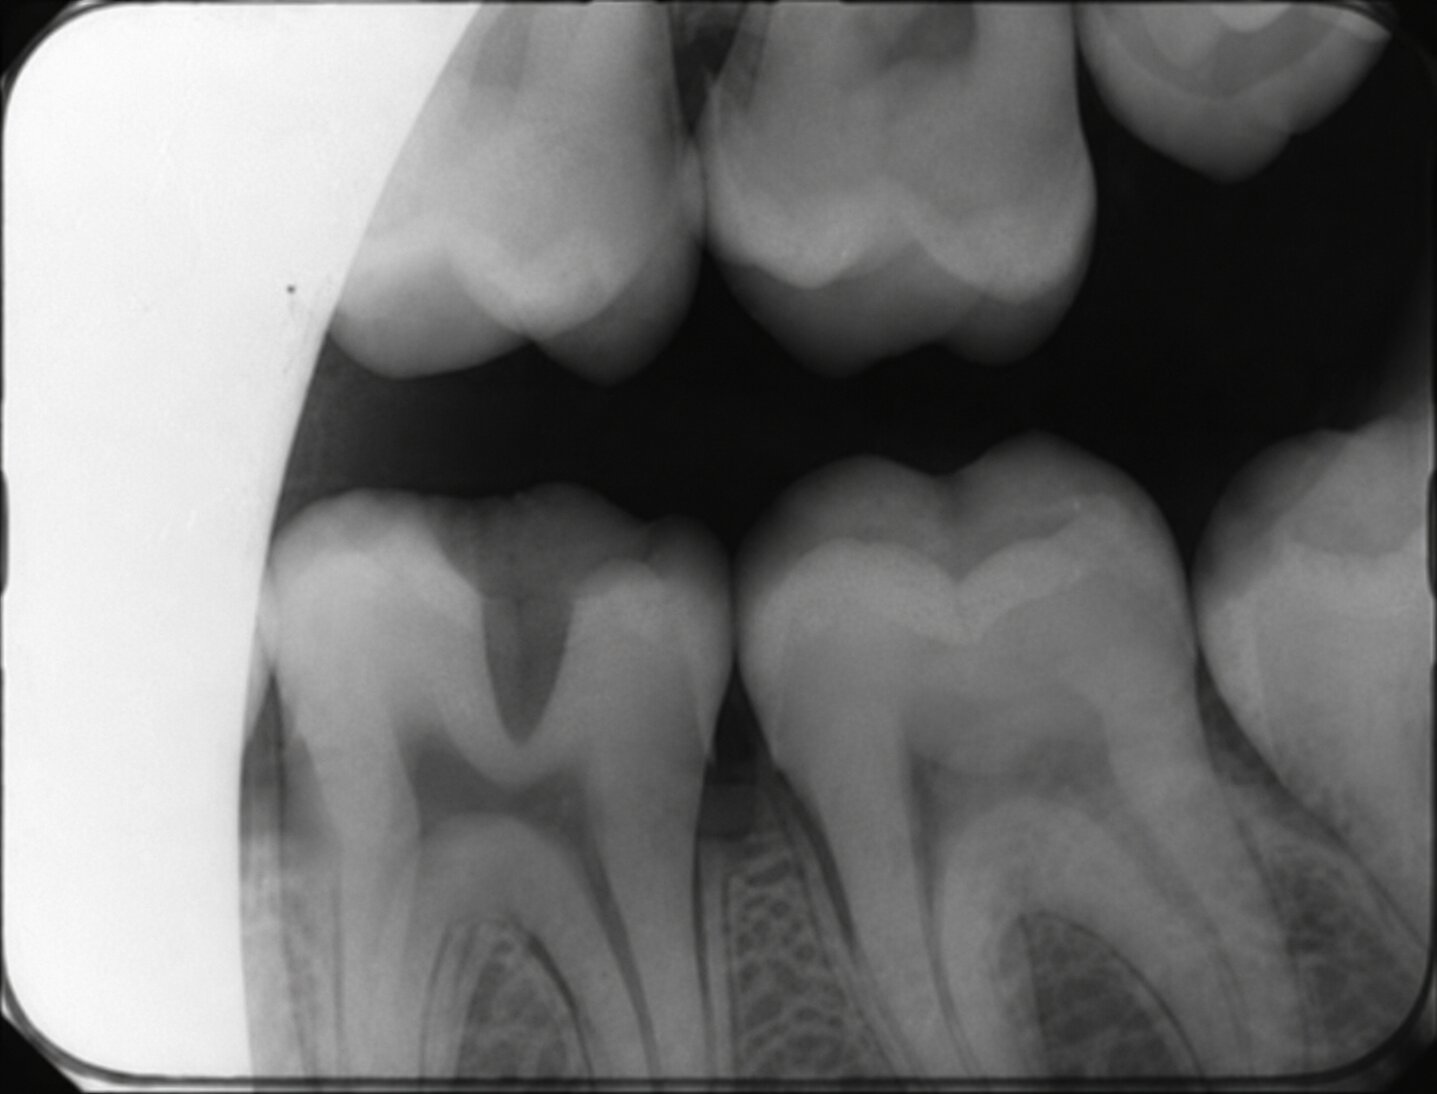
Look: a clear, curved blank band along one edge — no tooth detail in it.
Fix: re-center the PIDPosition Indicating Device — the cone-shaped tube that points the beam. Wasn't aimed over the whole receptor. over the receptor.
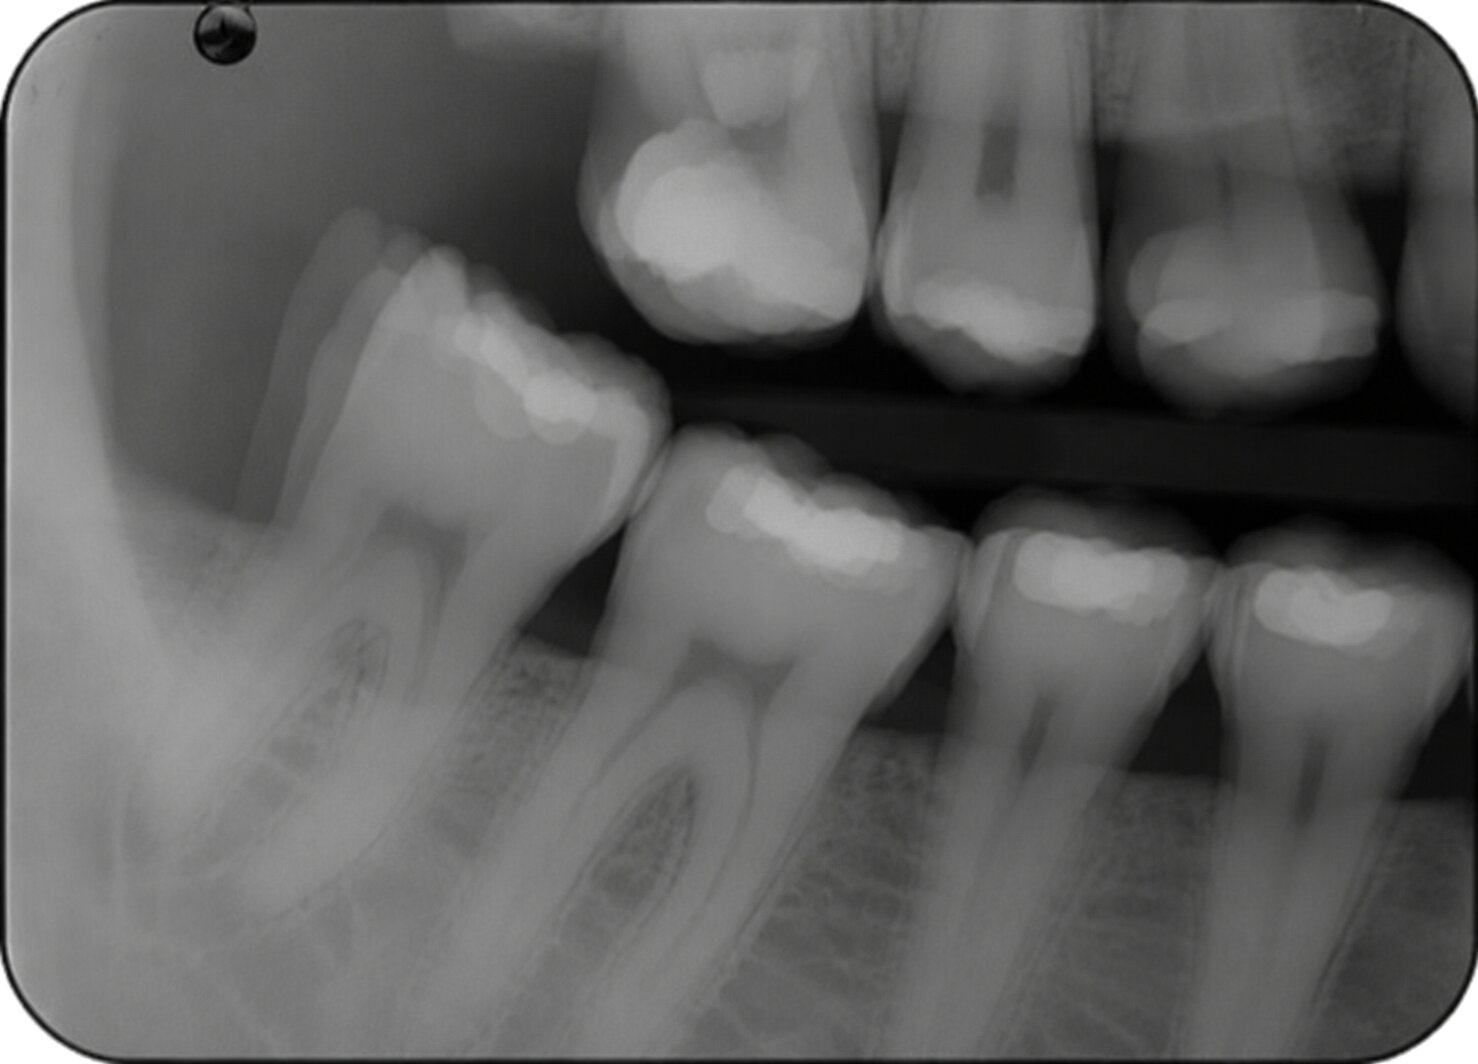
Look: the whole image is fuzzy or doubled, like a shaken photo.
Fix: stabilize the patient & receptor, then re-expose.
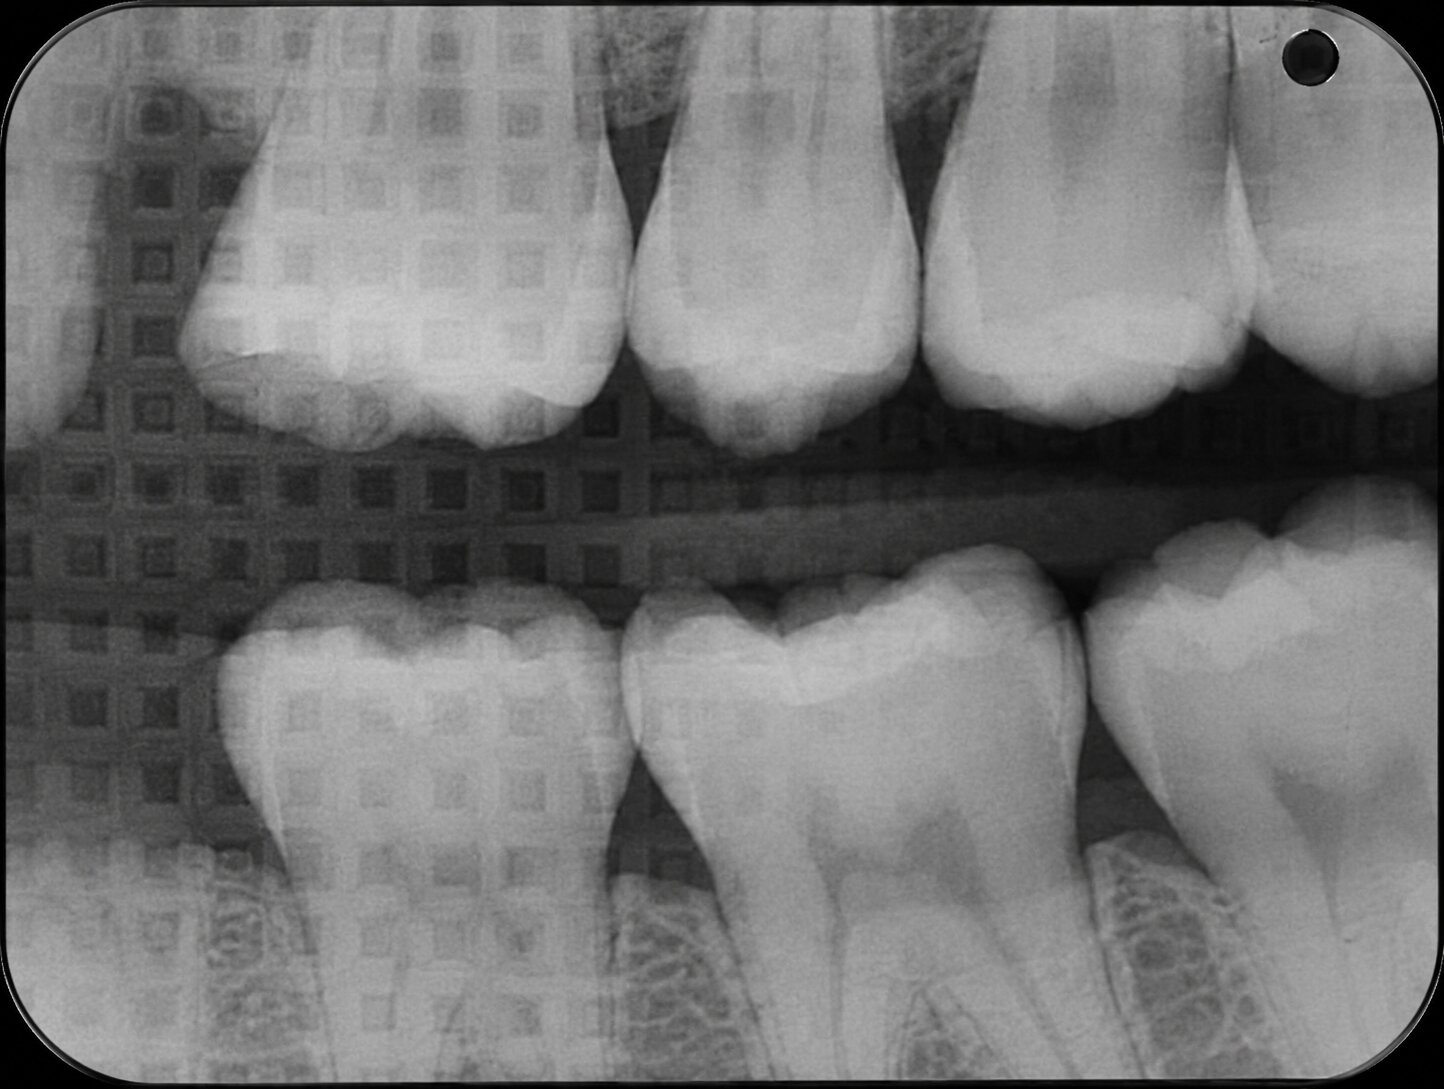
Look: a faint zig-zag / tire-track pattern over a too-light image.
Fix: place the receptorThe digital sensor or film packet. Placed backward, so the beam passed through the lead foil backing first — leaving its embossed pattern and a light image. front (bump/tab) toward the beam.
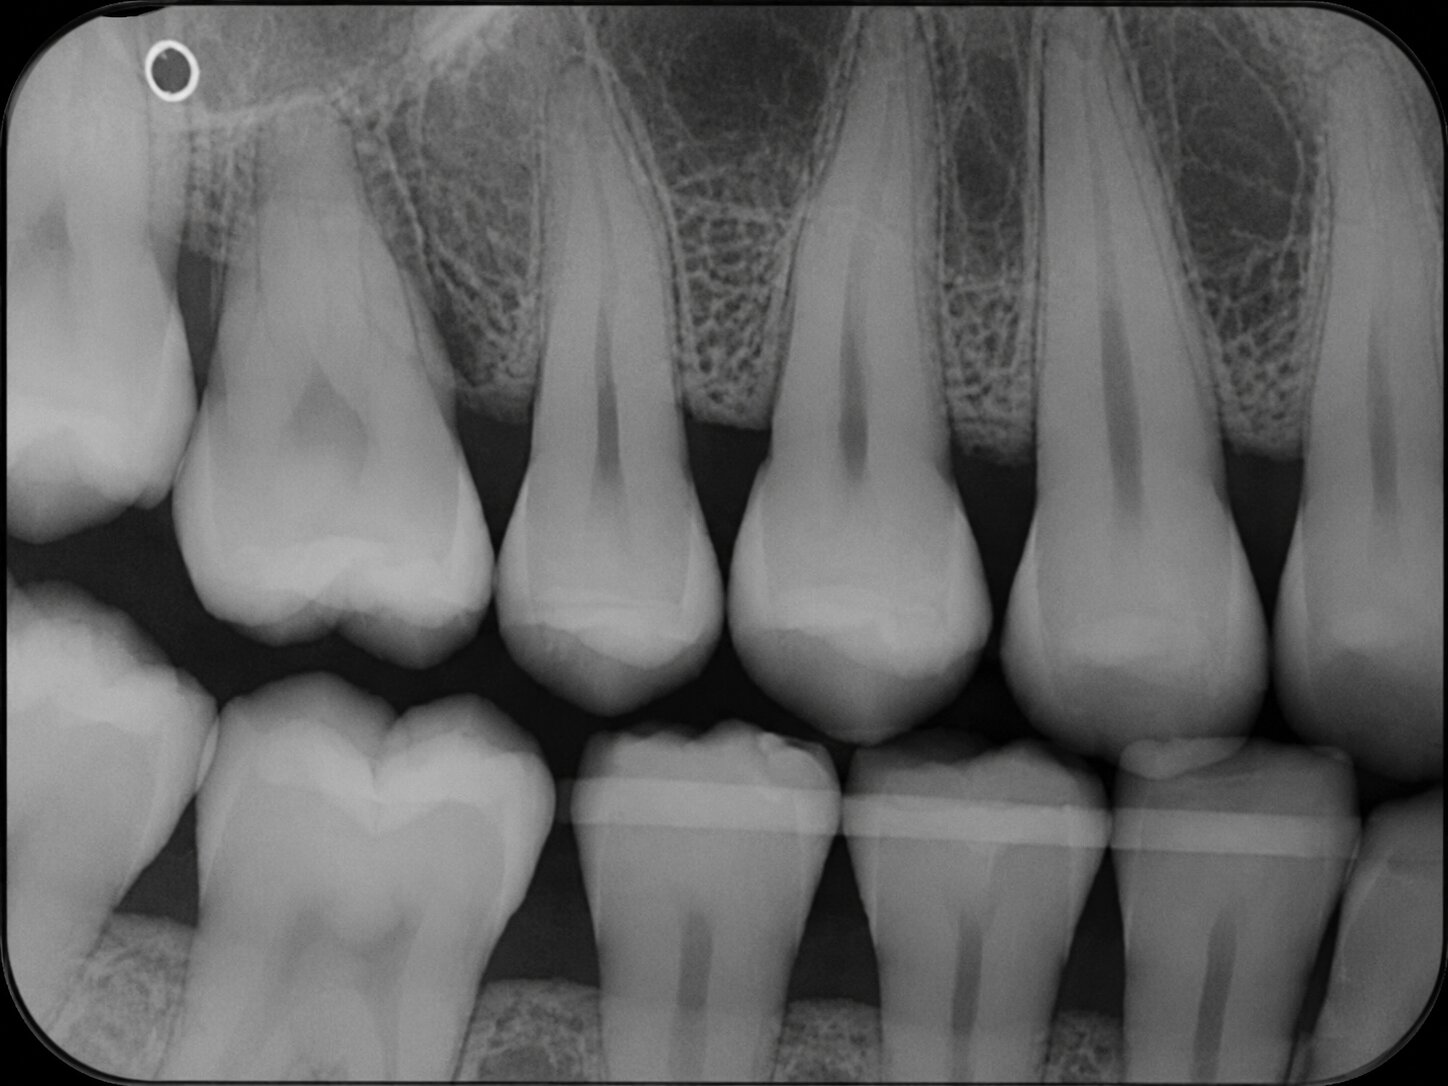
Look: too much gum/jaw showing; the crowns of one arch are cut off.
Fix: re-place the receptor to capture both arches evenly.

Look: a completely BLACK film — no image at all.
Fix: only open film in the dark / use proper light-tight handling.

Look: a completely CLEAR film — nothing on it.
Fix: check the machine actually fired & settings are correct.
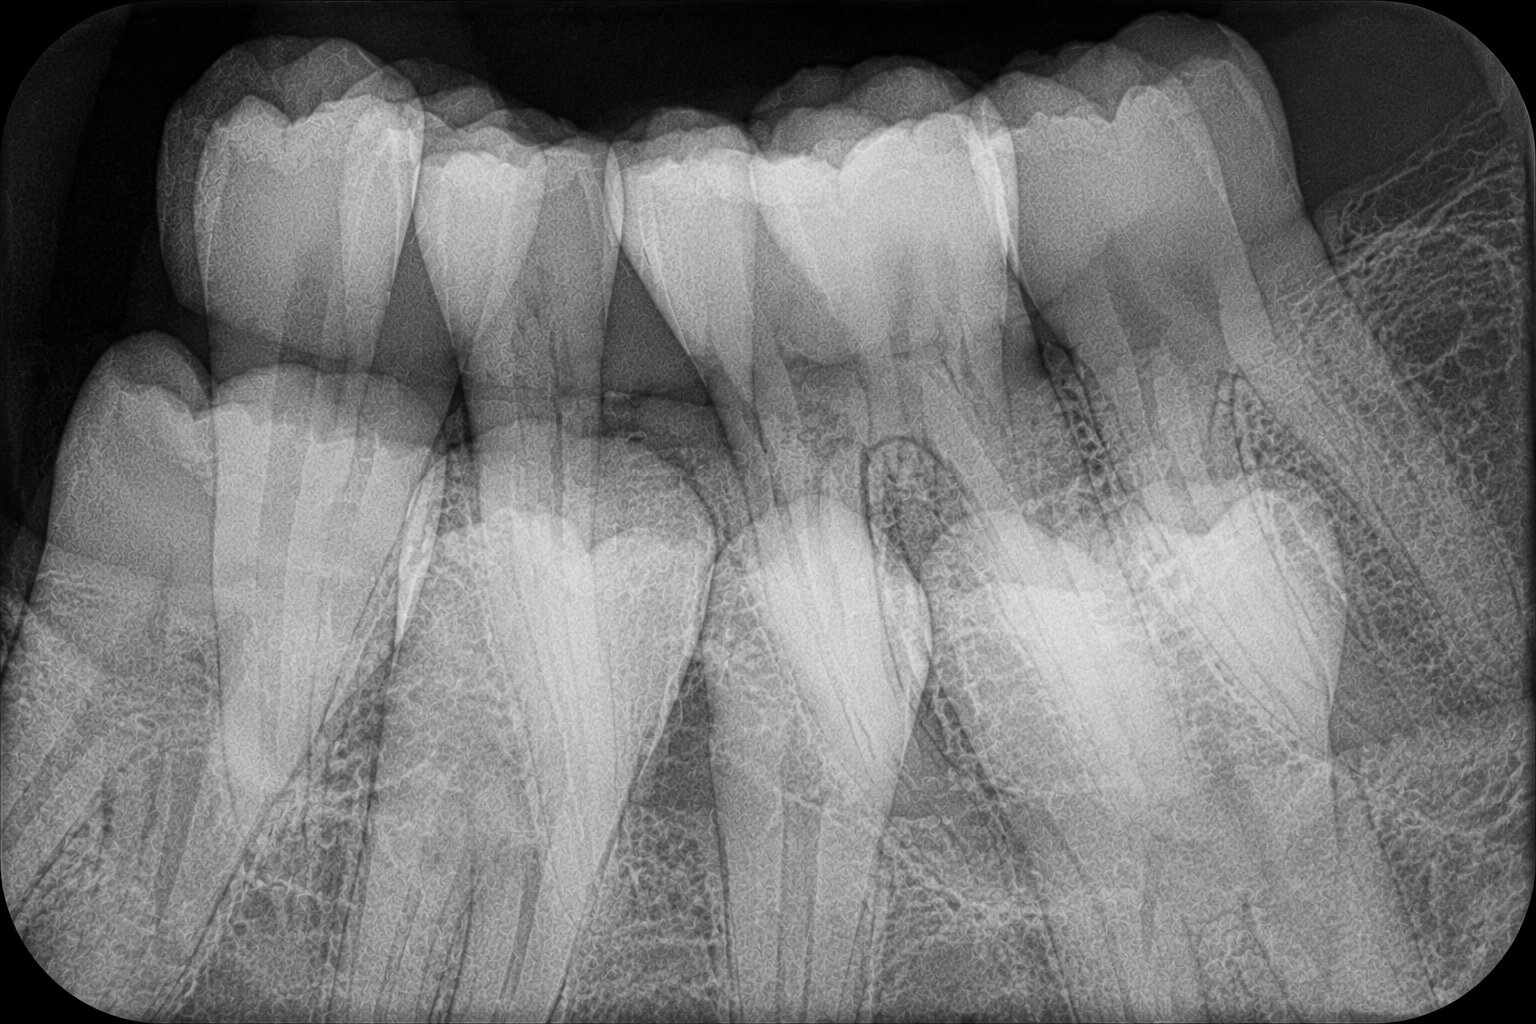
Look: two shots on one receptor — two sets of teeth overlap into one unreadable image.
Fix: ⚑ automatic retake — this one can't be salvaged.
The pair the exam loves to swap is black film vs. clear film. Here's the hook that locks it forever:
Light exposure turns the film bLack (light got to it → black). No exposure leaves Nothing — a clear film (no rays ever hit it). Black means it got too much; clear means it got none.
Old camera film: open a roll in daylight and it comes out solid black — light flooded it. Never run it through the camera at all and it stays blank and clear — nothing ever exposed it. Dental film is the same: light → black, no exposure → clear.
On test day you won't reason it out. You'll see the look and know the error — the clear band, the blur, the black film, the clear film. That's recognition, not memorization.
Next · Panoramic Errors →